🧱 Voxelizer
The Voxelizer is a powerful 3D editor with a Minecraft-like feel. It enables you to voxelize images and 3D models, edit block structures, and build with a wide variety of shapes and formats. Below, we'll walk through its main features.
🔨 Building
The Voxelizer allows you to add, remove, and edit blocks directly in your creation.
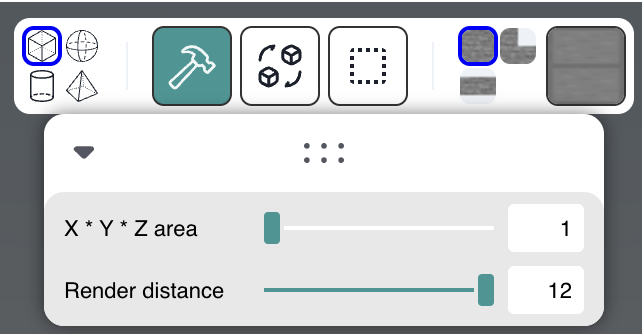
🛠️ Build Tools Overview
Using the build tools (shown below), you can:
- Add primitive shapes (far-left buttons)
- Place or delete blocks (hammer icon)
- Update textures of existing blocks (next to hammer)
- Highlight chunks to apply actions
- Choose between stairs, full blocks, or slabs
- Select the active block type
The control panel lets you define how many blocks to add per shape (e.g. a size of 20 with the sphere tool creates a 20 × 20 × 20 sphere).
📂 Handling Files
After importing a file, ensure it is active, then click anywhere in the world to place it. Different file types are handled slightly differently:
🖼️ Images & 3D Models
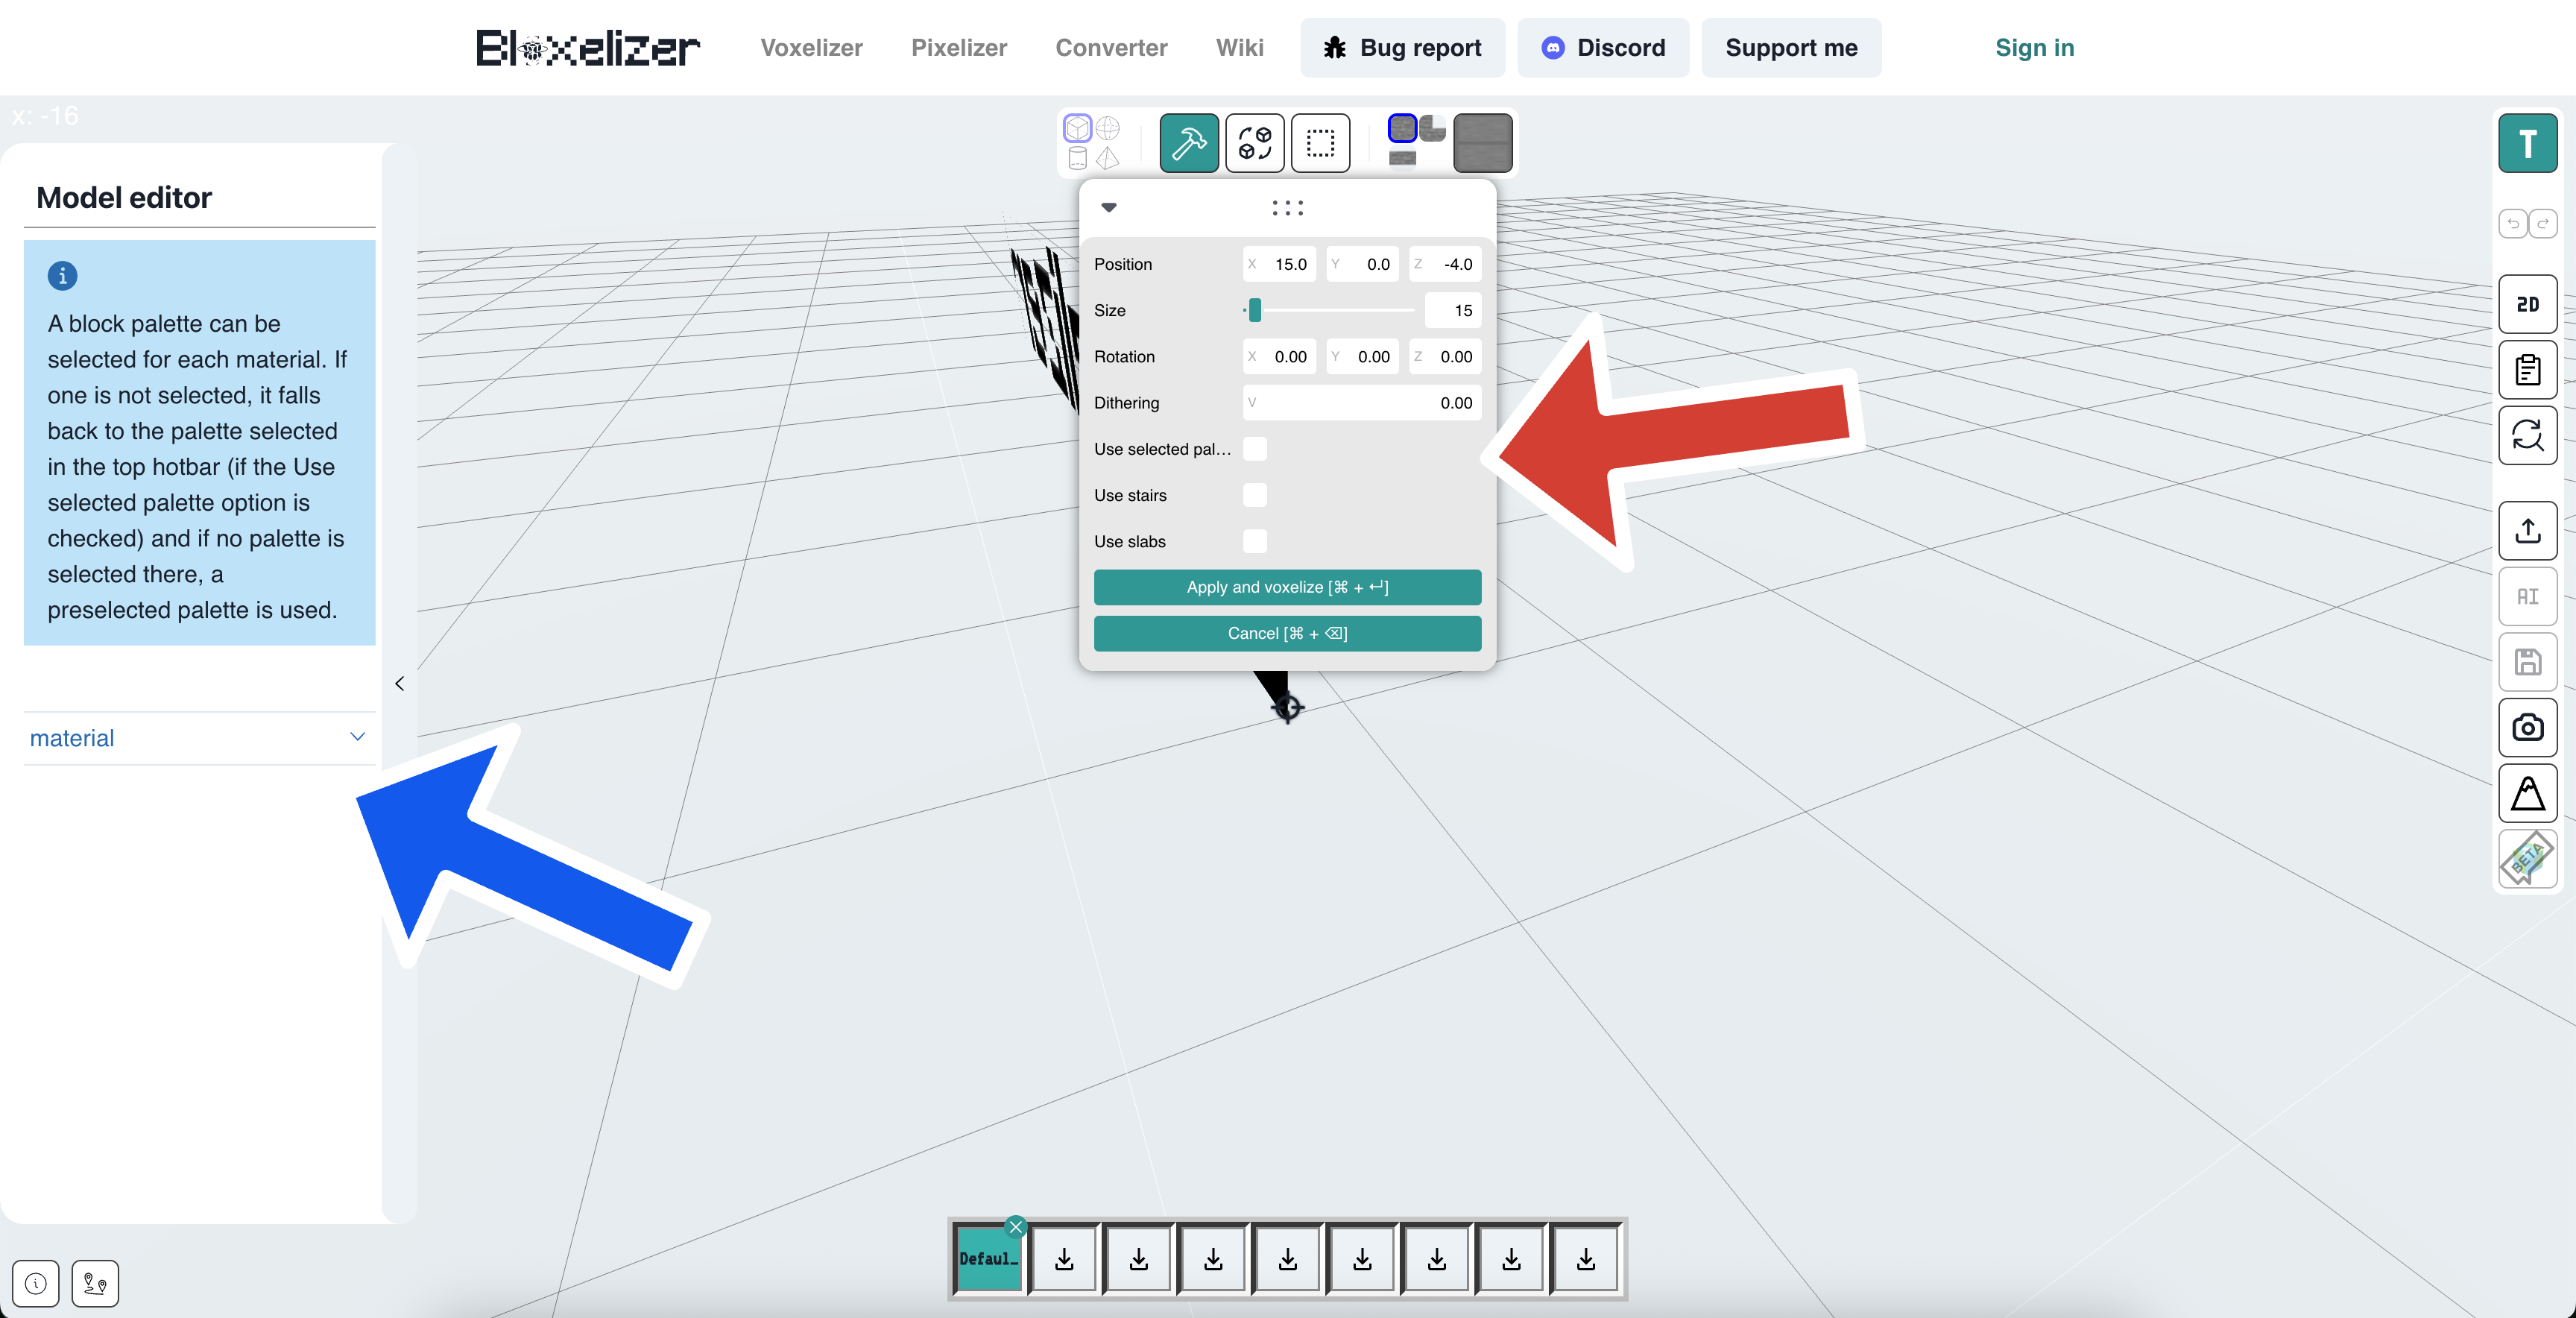
Once clicked into the world, the UI updates:
- The control panel (red arrow) reveals new model-specific options
- The model editor (blue arrow) appears in the left panel
📦 Minecraft Schematics
Importing Minecraft schematics (e.g. .schem, .litematic, .nbt, .schematic, .mcstructure) is similar, but with a few differences:
- There is no preview mode
- Schematics are placed immediately
- Smaller schematics allow you to rotate or move before finalizing
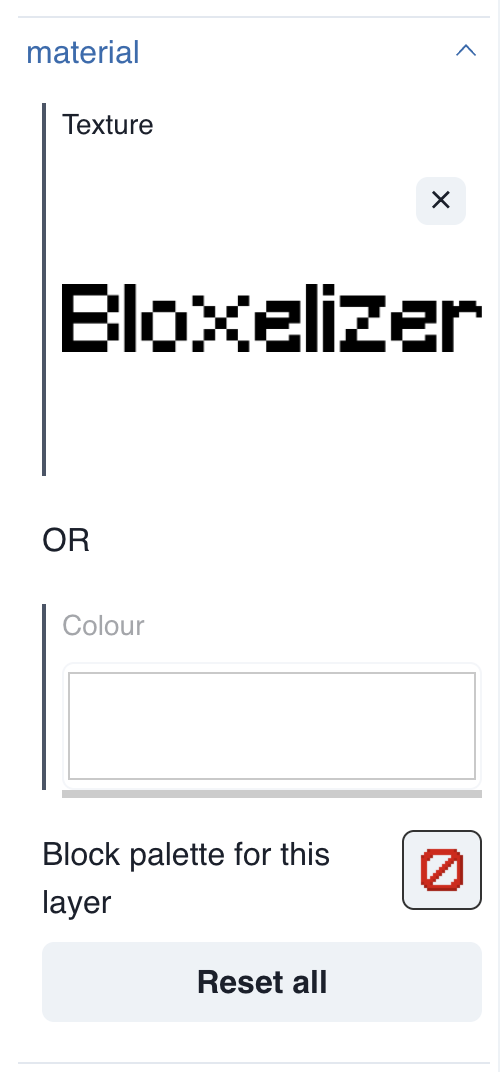
🎛️ Model Editor
The model editor lets you:
- Change the texture image or color
- Define a Minecraft block palette to use for material conversion
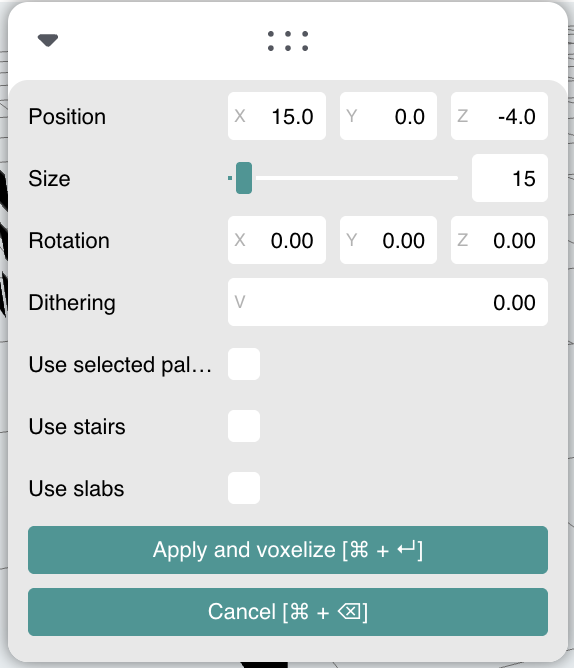
🎚️ Control Panel
The control panel is used throughout the app and adapts based on the context.
When working with images or 3D models, you can:
- Set the size (e.g. height in Minecraft blocks)
- Adjust position and rotation
- Choose to use stairs or slabs in the build
- Click "Apply and voxelize" to begin the voxelization process
➕ Adding Models to the Scene
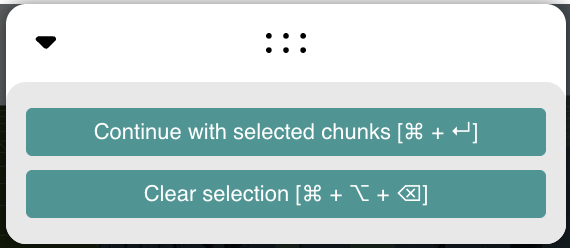
After voxelization:
- You can select additional chunks to move along with the current model
- Click "Continue with selected chunks" when ready
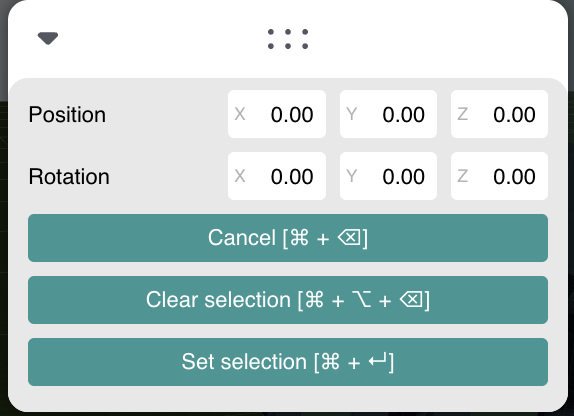
Then:
- Final control panel options appear
- Modify rotation, position, or cancel the action
- Click "Set selection" to finalize placement
✅ Your model is now officially added to the creation!
📁 Object Manager
The Object Manager shares the same panel as the Model Editor, but only appears when an object is selected in preview mode.
It allows you to:
- 🔄 Teleport to the model
- 🔍 Find and replace blocks within the model
- 🧅 View layers using the 3D Layer Viewer
- ✨ Highlight, move, duplicate, or clear the model
- 💾 Export as
.glb,.schem, or.litematic
📐 Right Toolbar
The right toolbar contains global tools for your entire creation.
- 🧱 Use the Layer Viewer to see your build in 2D, one layer at a time
- 📤 Export your entire creation (not just a model) to supported formats